 |
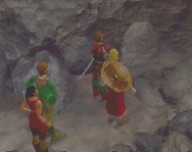
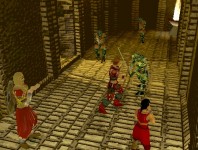
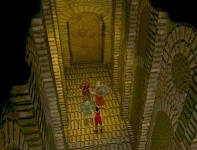
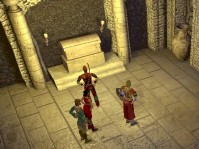
First, find the entry to the temple. A rock marked with a symbol is located in a small alcove on the path towards the beach. Press it to enter. Inside are 4 dark alcoves on either side of the entry door. The 2nd one in the left group (left, facing the entry) contains the solution to the laser puzzle lock but all skeleton warriors must be defeated before it can be read. (A detailed solution to the laser lock puzzle can be found in the "Hints" section) Failing to open the lock the first time will cause 2 warriors to attack the party. Defeat them [+250 exp]. Destroy the rest of the skeletons either 2 at a time (by failing to open the lock 3 more times) or 6 at once by searching the alcoves and then selecting the Attack response [+750 exp]. Among the booty are enchanted weapons, armor and rings | |||
| If you sustain damage, you may want to revisit the witch in Haldon Head for a free healing. She will heal 1 character per day. Repair armor and/or weapons at the merchant's or at Merrick's Shop (for a fee!). Rest at the inn or talk to some of the townfolk one last time (Lenore is still not a happy woman!) Strategy Tip: While here, you may want to cook up some Strong brews of Regeneration, Healing, Abjuration (protection against paralysis) and Fire Oil to help survive the upcoming battles. | 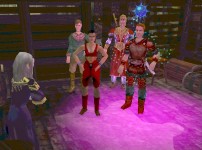 |
|||
| Return to Widow's Point and climb the road to the temple once again. Finally, solve the laser lock puzzle [+834 exp] and enter a room with an abyss which separates the room into 2 paths. | ||||
| . | ||||
 |
As you try to advance to the door on the left, battle TENTACLES [+334 exp]. Should your party decide to backtrack and pass this way again, Black Pearl Necklaces will prevent TENTACLES from reappearing if worn by all. Check the altar between the 2 doorways before you enter [storyline info]. | |||
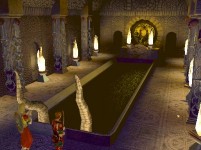
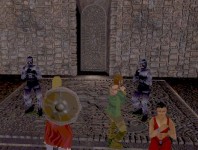
| Enter the throne room of the Lich. A sacred chest is protected by 5 Death Nagas. Being careful of their poisonous strike, kill them all [+860 exp] and open the chest. Although there is very little of value here, this is the first of six permanent caches in the temple. Exit the same way you entered and pass through the door on the right side of the room. | 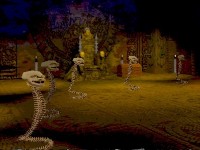 |
|||
 |
The corridor which looms before our the brave party joins all the main sections of the temple: goblin headquarters (straight forward), catacombs (end of hallway which branches left), slave pen room (first doorway on left after branch), the Tentacle-guarded chamber (which you just passed!). Heading straight ahead will trigger an attack by a Goblin Warlord, 3 Goblin Warriors and a Goblin Archer. (Be sure to loot the archer for arrows, if James is running short.) Killing this group of enemies will earn 803 exp points. You will need to change the camera angle several times to be able to view both hallways. | |||
| Continue to the room at the back of the hallway. Entering the room will trigger an attack by a Goblin Shaman, a Goblin Warlord, a Goblin Tribal Leader, 2 Goblin Warriors and 2 Goblin Archers. The Shaman will attack with spells, so it's important to neutralize his ability. After killing these 7 adversaries [+1479 exp], check all the bodies and the chest. Among the booty is an enchanted bow, arrows, Elven Chainmail (great for Solon!) and the SLAVE PEN KEY. Here is the 2nd permanent cache (chest). You can stash any loot from the bodies here and return whenever it's convenient. Pass through the door back into the main corridor. |  |
|||
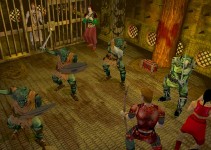 |
When your party enters this room, they will immediately be surrounded by 4 Goblins, a Goblin Warrior and a Necromancer to the rear of the room. Kill them all [+1207 exp] and release the prisoners [+834 exp] (Either have James use the SLAVE PEN KEY or pick the lock.). Loot all the bodies and the chest. Give the NECROMANCER'S KEY to James for safekeeping. You may use this chest as a permanent cache (#3) for reserve supplies between battles. | |||
| PRISON BREAK!
For an excellent test of your combat skills, you can force a tough prison breakout scene. Instead of killing all the enemies, LET THEM DEFEAT THE ENTIRE PARTY! Your team will not die, but rather, will revive, locked inside the slave pen with other townfolk captives. In this scenario is revealed some of the details of Haldon Head's evil possession... not available in any other way. Talk to the real FATHER ROWELAND! James will pick the lock to escape with the other 3 members and immediately battle the original group of Goblins (sans Necromancer this time!). The health of the party members is already depleted, almost near death, when the battle begins. (Hint: grab the items from the chests as soon as you can!) Winning this combat will earn the survivors +787 exp. |
 |
|||
| . | ||||
| Now... on to the CATACOMBS! | ||||
| . | ||||
 |
The doorway to the CATACOMBS is at the end of a hallway which branches to the left of the entry from the TENTACLES room (during the first battle, you probably passed right by it!). This door is not locked. Enter the CATACOMBS. (Note: By revisiting the different areas of the CATACOMBS, you can trigger many more random battles with Goblins and Ghouls where you can gain more experience. The following lists only the unique events which occur in this part of the game.) | |||
| Fight 2 Ghouls [+300 exp]. Watch out for their paralysis attack! Check out the map with the Krondor menu. There are 5 sections which highlight when you mouseover. Visit each section, selecting counter-clockwise from the ENTRYWAY, #1 (On the map of The Catacombs , the sequence 1 thru 6 will encounter events as intended.). The first area visited will arouse the ghost of a dead Ishapian priest, Michael, who gives Solon a sacred scepter[no exp]. Revisit the same area again and you will face a door which passes to the GALLERY OF STATUES. Enter the room. | 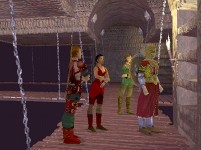 |
|||
 |
Fight and destroy 6 Shadows [+656 exp]. Their Lifedrain attack can be controlled easily with Strong Potion of Undead Protection or an offensive attack of blinding spells. After the battle check the statue in the R/H corner for a nice cache and the solution to a door lock in another section of the cats. Leave the Gallery and continue counter-clockwise to the next section. [Statue = Permanent Cache #4] | |||
| You will likely encounter more Ghouls before entering the room. Each Ghoul your party destroys is worth +150 exp. Enter the room. Either have James pick the lock or use the NECROMANCER'S KEY found in the SLAVE PEN ROOM. Although the Necromancer threatens your team, it should be easy to dispose of him, a Ghoul and a Skeleton Warrior [+912 exp]. Strategy Tip: Stop the Necromancer from completing his slow casting by shooting an arrow or tossing some fire oil. Besides the Secret Mage Books and Scrolls on the right shelf, there is a bottle of ALCHEMICAL CATALYST which will be needed later, on the shelf on the left. Now search Solon's inventory for the SCEPTER OF KARACK and use it to break the false Black Pearl (the real test is yet to come!) [+834 exp Solon, +500 others]. If any of your mages need to increase their spell repertoire, read the books and scrolls and then leave the NECROMANCER'S WORKSHOP the way you entered. [Shelves = Permanent Cache #5] | 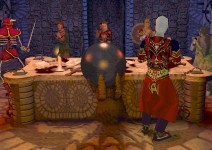 |
|||
 |
Skip the next area on the map (counterclockwise from the Necromancer's Room) and enter the bottom room. Here your party will encounter a lock with 5 stone wheels which need to be turned to the correct pattern. Even if you remember the solution from the HALL OF STATUES, pick an incorrect pattern and drop into a pit. Kill Monster [+125 exp], heal and revisit the same door again. This time solve the puzzle (Final Tomb Door Solution), opening the door. Proceed towards the tomb. Kill 4 Skulls (Fire Lance attack) [+3038 exp] and grab the amulet. The TOMB is actually a permanent cache (#6) of very handy items, including a SKULL KEY which can be used later. Grab what you like and then return to the main passageway. | |||
| Transport the party to the lower right corner area and enter the room. Kill the 5 Ghouls guarding the room [+750 exp] and then use the ALCHEMICAL CATALYST to change the monster back to human form [+209 exp]. Leave this area (CORPSE STORAGE ROOM) and return to the passageway. |  |
|||
 |
Finally, transport the party to the remaining area (the section on the far left corner, next to the TOMB). Destroy the 2 Skulls which protect the entrance [+1519 exp]. Don't forget to loot the amulets! Either have James pick the lock or use the SKULL KEY which was found in the TOMB. Enter the HALL OF SKELETONS. | |||
| Your weary party will encounter 7 Skeleton Warriors who menacingly warn the team to leave, but there is no way out but to fight. Destroy the enemies for +875 exp, heal all and refill magic points. The battle to come will require full stamina to survive! The spiked door at the rear of the room leads to the Lich's chamber. |  |
|||
 |
Enter the Lich's room. Again, there is no way out but to destroy the infidels. Destroy at least 2 Ghouls, 4 Skeleton Warriors and the "Dark God" [+6876 exp]. Strategy Tip: The Lich will regenerate all damage taken until the first "wave" of cohorts are destroyed. During this time, Solon and James should use Strong Potions of Striking and Might to multiply damage to be inflicted, but refrain from hand-to-hand with the Lich until the first wave are dead. James' attack will be most effective by using Grease of Poison and a bow. For those without a ranged attack, use fire oil to attack the Lich when he starts to float. Tossing Holy Balm also works. Loot the bodies and then break the Black Pearl (A scepter is not required) to end the chapter. (+4167 exp points will be added at the beginning of Chapter 10) | |||
| . | ||||
| Whewwww! Now that wasn't that bad at all, was it??? :P | ||||